As I am sure, most everyone reading this has heard that the use of simple passwords is no longer "secure". ...
As I am sure, most everyone reading this has heard that the use of simple passwords is no longer "secure". Additionally, the use of a single authentication credential is a thing of the past and now most everything from your work accounts to your social media supports, and in some cases is pushing/requiring, multifactor authentication. Worry no more! Cisco ISE and Tunnel Extensible Authentication Protocol (TEAP) is now widely supported to add that additional layer of security to your authentication needs!
TEAP Support
As with any protocol, support is a key item to verify before heading down the path of configuration and deployment. The TEAP RFC 7170 was presented as a proposed standard in May of 2014, but the work began way back in 2011. If you already guessed, it took a while after the RFC release to get the capabilities into solutions and operating systems. Windows began support for TEAP with Windows 10 Version 2004 in May of 2020 and solutions such as Cisco ISE with version 2.7 Patch in July of 2020.
The main benefit of TEAP comes in the form of the ability to pass multiple authentication methods within a single EAP conversation. Traditional EAP (RFC 3748) does not support this and therefore only one credential can be passed as the form of authentication. TEAP uses cryptographic bindings to secure the inner credential methods to allow a serial/sequenced (not simultaneous/parallel) passing of credentials to the authentication server. This method of authentication is commonly referred to as "EAP Chaining". Now let's see how it is configured on ISE 3.2 and Windows 10/11.
The Configuration
The Server Side
Step 1:
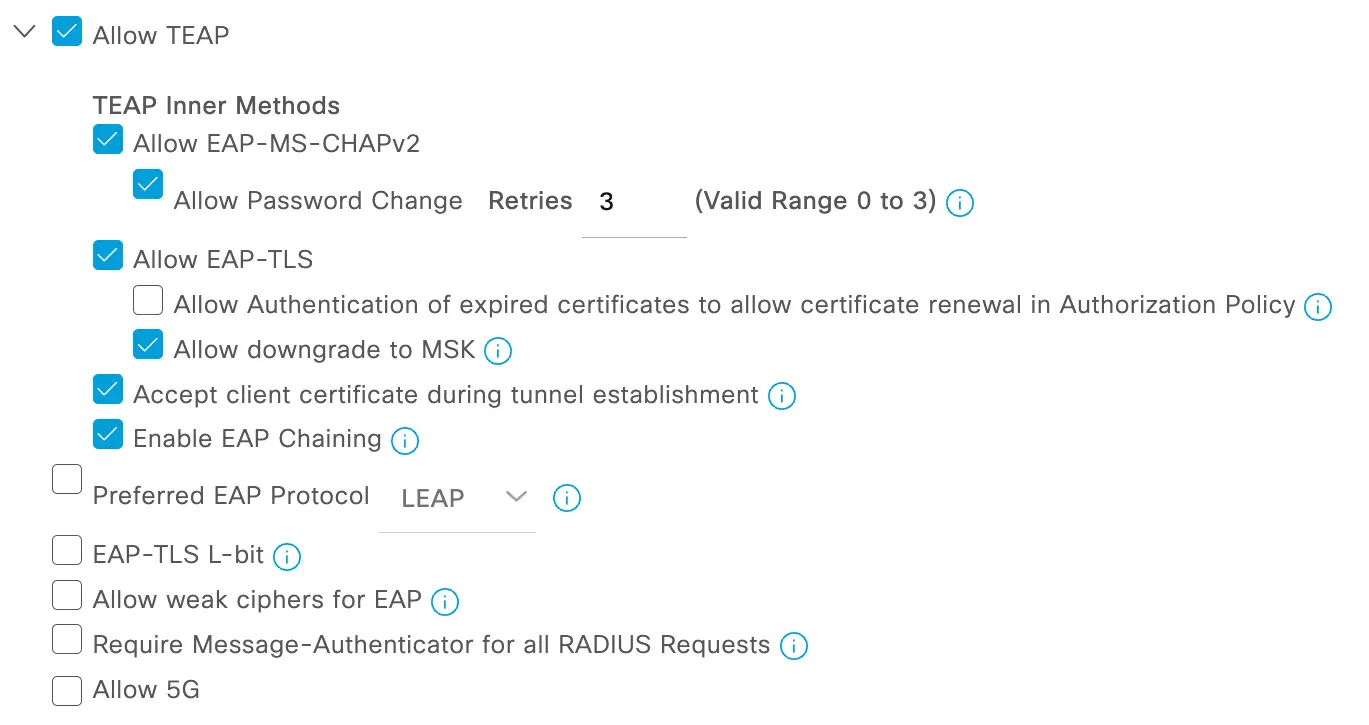
By default, Cisco ISE does not have EAP Chaining enabled for TEAP, so we will need to enable that before we can start to build a policy around the use case.
To enable TEAP EAP Chaining go to Policy > Policy Elements > Results and select "Allowed Protocols" under the Authentication section. You can either choose to modify the "Default Network Access" settings or create your own. At the bottom of the Allowed Protocols settings page, you will find the TEAP Settings. Click the check box next to "Allow EAP Chaining" and save.
Step 2:
After enabling EAP Chaining we will need to instruct ISE on where to look up the credentials that are sent in the inner tunnels of TEAP. Commonly this is either using certificates with EAP-TLS, credential validation with Microsoft Active Directory, or sometimes a mix of both. With that in mind, we will setup this instance to support any of the mixes of credentials that could happen within TEAP.
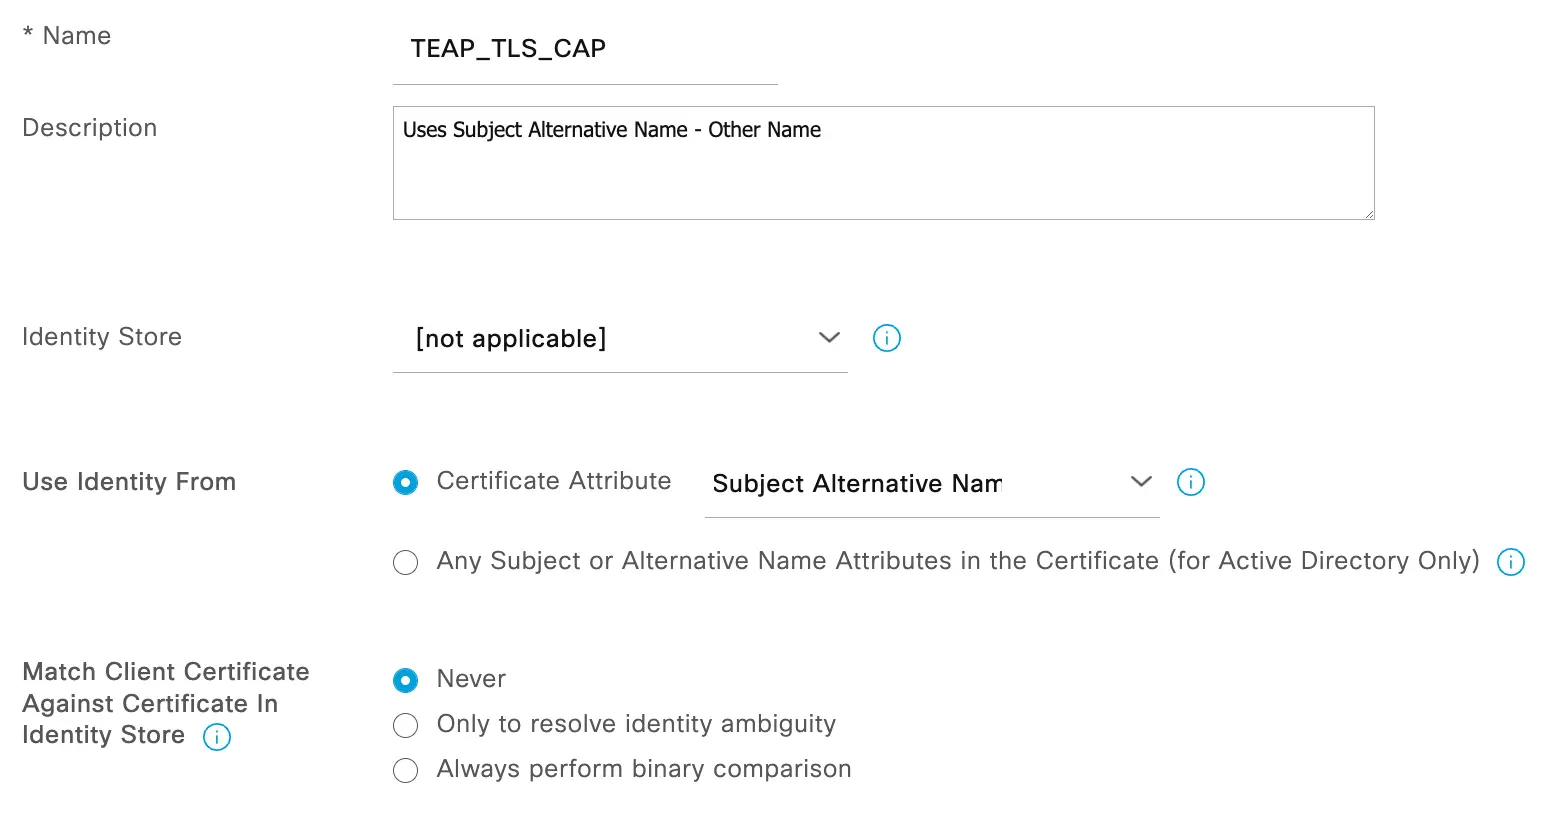
Navigate to Administration > Identities > Identity Source Sequences and start with a new Certificate Authentication Profile (CAP). In the new CAP, give it a name and description. Next, you will need to select the certificate attribute that will be extracted from the certificate to include in the logs and perform lookups in an identity store if needed. In this example, we will use "Subject Alternative Name - Other Name".
Step 3:
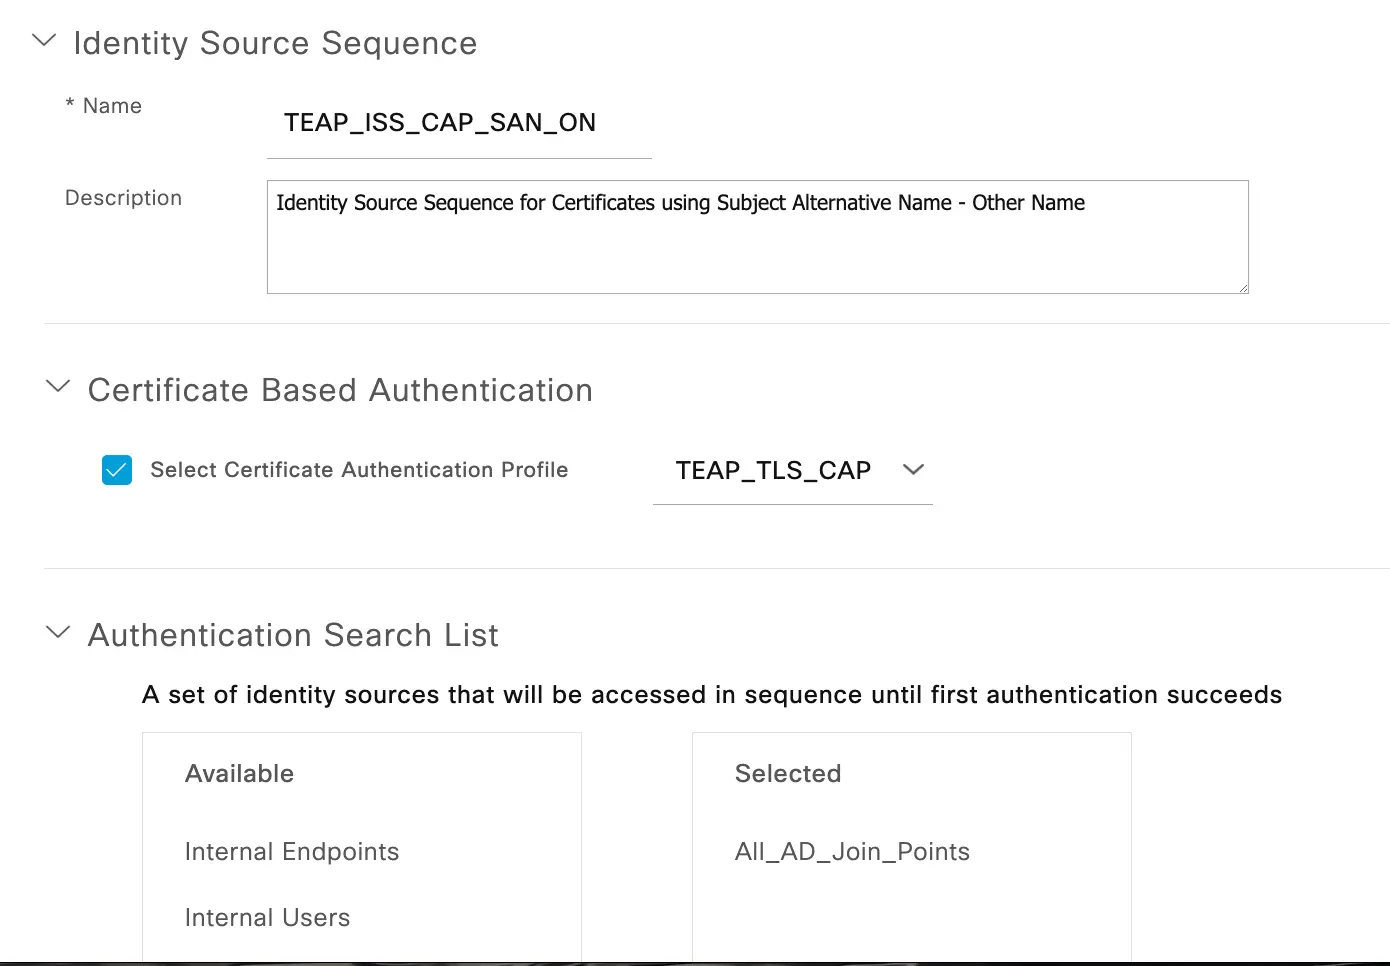
Next, we will need to associate the CAP with an Identity Source Sequence (ISS). The ISS tells ISE how to process authentication requests and the order in which to iterate in the event of multiple identity stores (AD, LDAP, etc). In the instance where differing certificate attributes are used for machine and user certificates, you may need to create two CAP and two ISS processes to use for differing methods.
Navigate to Administration > Identity Management > Identity Source Sequences and either select an existing sequence or create a new one. Select the CAP you built previously and then move the identity stores that you would want to do lookups to into the "Selected" column. Also, make sure you select the right action in the Advanced Search settings to ensure that all sources are used in the case of one being unavailable. I usually select the "proceed" option to ensure that all sources are evaluated in the event of an error.
Step 4:
Finally, we will need to build a policy that references our ISS and applies rules to the session based on what combination of credentials was provided at the time of request.
Navigate to Policy > Policy Sets and select the policy that will apply based on the Policy Set Conditions. Under the policy set we will need to change the Authentication rules for 802.1X (Wired & Wireless) to use the ISS we created to support our TEAP authentications.

Then under the Authorization policy, we will need to build out the permutations of what credentials may be supplied versus validated. The Dictionary where we can find EAP Chaining rules is called "Network Access" and the attribute is "EapChainingResult". There are a total of 4 options under this dictionary attribute that are pretty self-explanatory and listed below.
- No chaining
- User and machine both succeeded
- User failed and machine succeeded
- User succeeded and machine failed
With these attributes the policy can now cover many of the primary use cases of TEAP and EAP Chaining, particularly preventing a user with a valid credential to connect to the protected network with ANY machine OTHER than an enterprise asset. Additionally, rules will be built to handle machines that are dormant with no active user logged in. Finally, covering the case of the user trying to log in with a personal asset and moving them to a Guest Flow. Since all the permutations of the attribute are covered and already compound in nature, the order of the rules in policy is rather irrelevant. However, I like to put the rules in an order of higher privilege towards the bottom of the set.

Once all these steps are completed we can now move on to the client side and TEAP configuration on the Windows OS Native Supplicant.
The Client Side
Step 1:
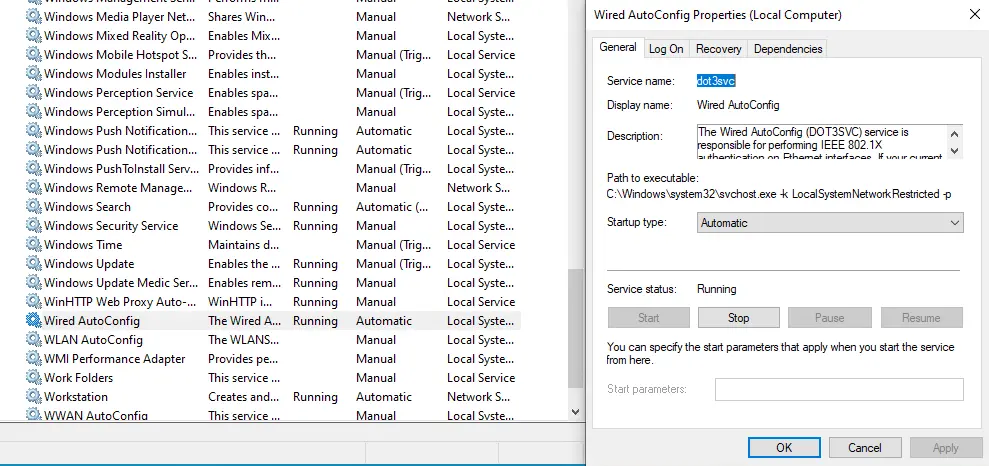
Starting out with the endpoint we will need to first make sure that the Wired AutoConfig service is enabled and setup for Automatic startup on system boot. If you do not see the Authentication tab on the network settings steps later in this guide, it is because the service is not started. My preferred way to get to the settings quickly is by opening the Run dialog (Windows + R) and entering "services.msc." Once the services pane is open, towards the bottom you will find the "Wired AutoConfig" service. Double click and set "Startup type" to Automatic, then click "Start" and finally "Apply" and close the window.
Step 2:
Next, we will need to get to the settings on the network adapter for this wired 802.1X example. To get to the connector properties, I again will execute the Run dialog and now type "ncpa.cpl". In the resulting pane, we need to select the interface that we wish to enable TEAP, and right-click for Properties, and go to the Authentication tab.
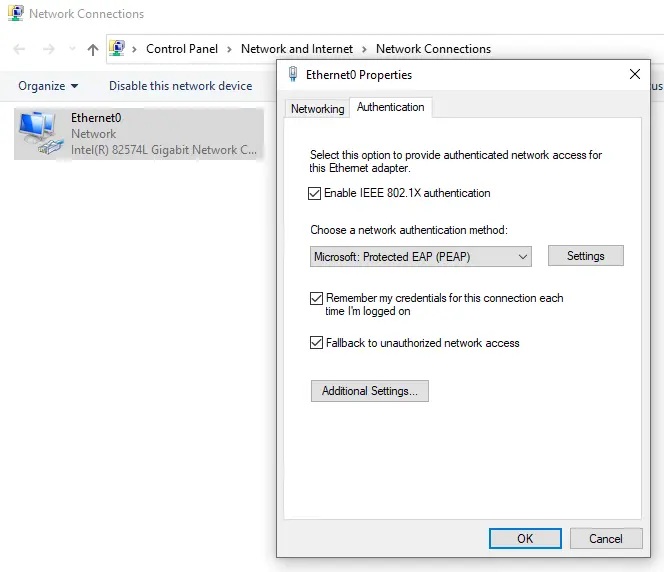
By default, the authentication settings will be set for Protected EAP (PEAP) which is not what we want, as that only supports a single credential. Therefore we need to change the authentication method in the drop-down dialog to "Microsoft: EAP_TEAP," and then select the Settings box to further configure the TEAP parameters.
Step 3:
Under the TEAP Settings options, we will see a few items to configure to ensure that the correct credentials are sent and done in a secure manner.
The first option is the "Enable Identity Privacy" option.
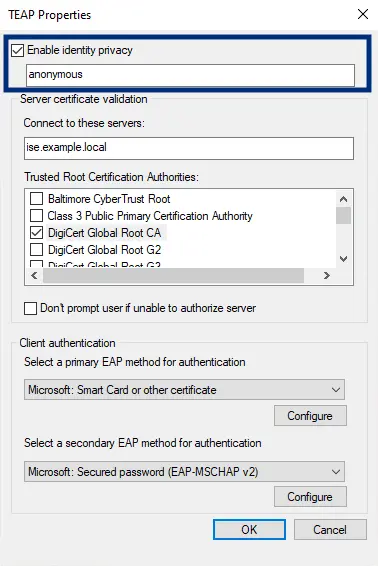
Ensure that this is checked and that the value is "anonymous." This setting instructs the supplicant to send the username of "anonymous" in place of a credential that is either not yet available or missing at the time of request. An example would be when a user is logged out and only the machine credential is available.
The next option is the "Server certificate validation" section.
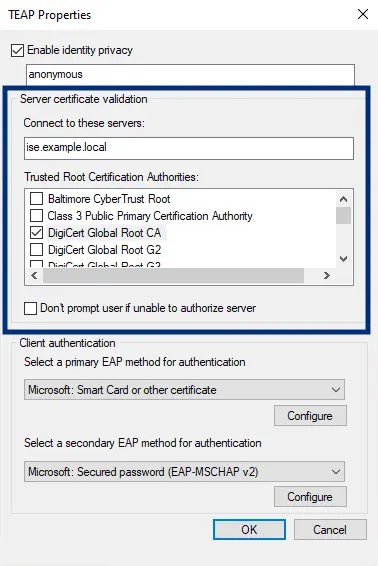
This section will be variable based on how your ISE deployment certificates are issued. If you have public signed certificates, and the public root is listed, ensure that the certificate is selected. If you are using an internal certificate authority, you must ensure that the root is installed on the machine for it to be available in this configuration section. The "Connect to these servers" configuration is an optional setting. The purpose here is that if you desire to only allow the TEAP supplicant to send credentials to the FQDN of the ISE PSNs in your environment, then they need to be listed here in a comma-separated format. Otherwise, if left blank, the client will send credentials to any 802.1X authenticator that requests authentication. Finally, the checkbox for untrusted server certificates can be left in the hands of the user or not based on your policy and selection on the last option.
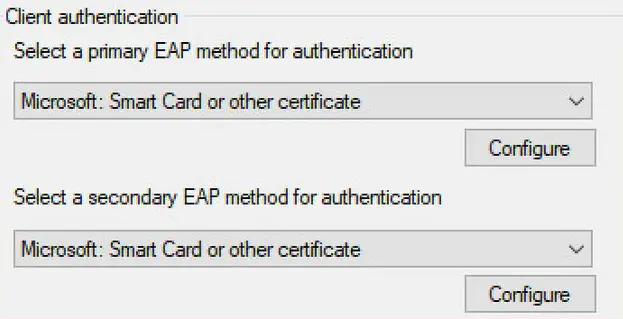
The last section is the "Client authentication" option, which is where the TEAP and EAP Chaining function comes to fruition.
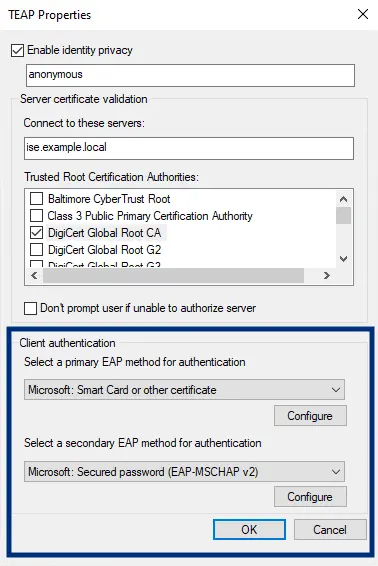
Under this section, we will instruct the client on how to offer credentials to the authentication server on request. There are only three options under each method selection.
- none
- Microsoft: Smart Card or other Certificate
- Microsoft: Secured password (EAP-MSCHAP v2)
The client and the TEAP protocol allows a mix of any of these three options, so play with these settings to your hearts content, assuming you have credentials or certificates that is. Additionally, you can configure options under each for the instance where you may have multiple user or machine certificates and need to specify certificate selection, or for MSCHAP you may need to configure the option to automatically use the logged-in credentials instead of prompting the user.
Finally, I feel that I should mention that enabling TEAP in your environment does not require any network infrastructure changes if you are already running another 802.1X deployment successfully. Since TEAP is merely an extension of the EAP protocol, the network infrastructure already knows how to handle and pass the packets between the authentication server and the client, which is where the TEAP and EAP Chaining magic happens.
The Final Step
Test, test, and test again. Play with the settings and break things so you can see how the client and ISE react to misconfigurations or missing credentials. I cannot instill this enough with my peers that finding a working configuration is GREAT, but if you don't know or see how systems act when the configuration is perfectly working, it can make troubleshooting that much more complicated.
I hope you enjoyed this walk-through of TEAP authentication and EAP Chaining with ISE!
ModernCyber’s Services
If you are looking for help with deployment services using a proven methodology with consistent results let us know. We are actively working on multiple projects where ISE and 802.1X are key elements of the customer mission and proven steps towards a mature Zero Trust architecture. We would love to help you too!
Schedule some time to speak with one of our cybersecurity experts.