When you first install a new ISE deployment the Cisco BU, TMEs, and members of the field have done a great job of ...
When you first install a new ISE deployment the Cisco BU, TMEs, and members of the field have done a great job of providing a bunch of preconfigured flows for common use cases such as Guest Access, Bring You Own Device, Posture, and more. While this is nice, I commonly need to make minor and major changes to the polices based on the environment I am deploying into. One of the scenarios that I had to configure recently but couldn't remember or easily find the answer was the need to allow a user to register thier MAC address through the BYOD flow without the need to also install a Native Supplicant Provisioning (NSP) profile.
Why?

In some cases, there may be a need to register a device's MAC address in an ISE BYOD flow without the desire to provision a certificate or supplicant profile to an endpoint. For instance, I had a recent requirement where posture could only be run via the dissolvable agent but the device should be allowed access for a determined time after that initial posture assessment. In this case, we needed to assess posture and then register the device so that any subsequent attempt to access the network would be allowed based on its initial assessment. For this, we need device registration without the default native supplicant provisioning (NSP) process.
The poorly worded knob to turn
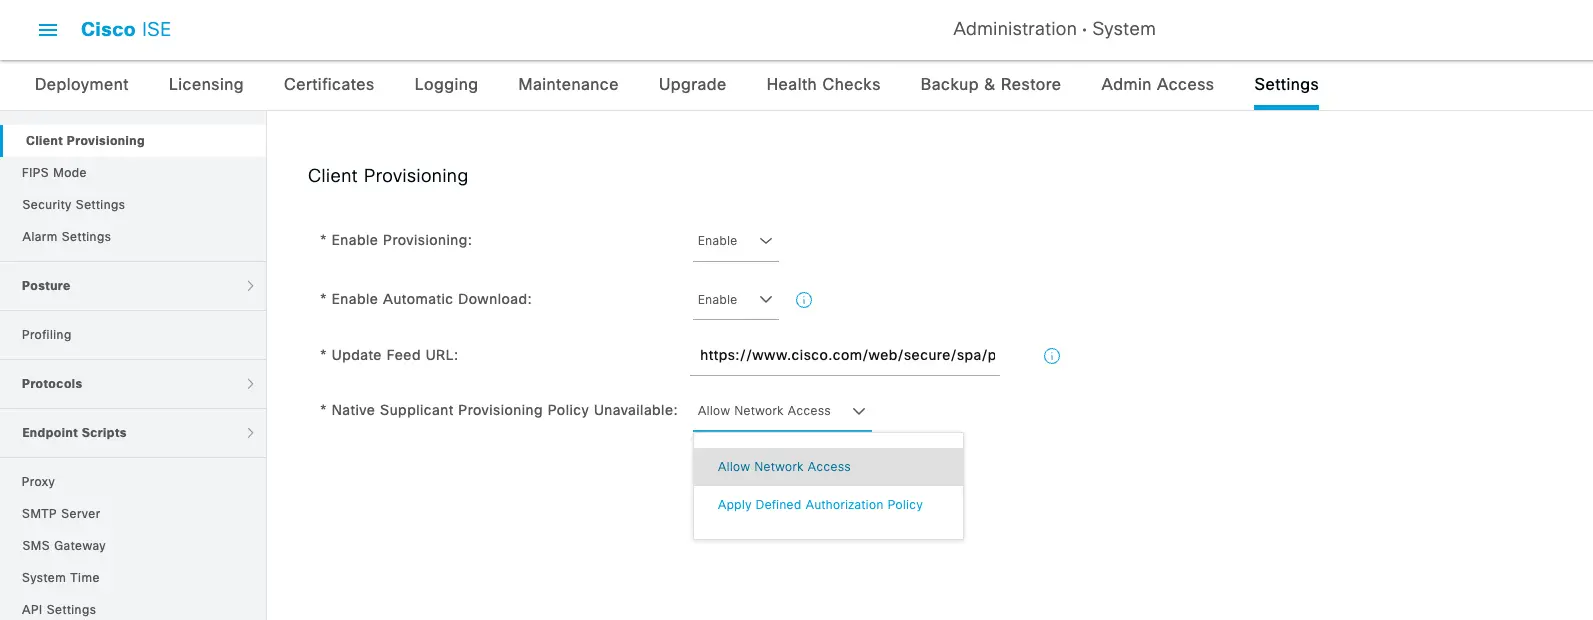
So, if you haven't done this before or read the somewhat cryptic documentation guides the "knob" is labeled as "Native Supplicant Provisioning Policy Unavailable". The configuration options are "Allow Network Access" and "Apply Defined Authorization Policy". Seems clear as day right? Well, let's take a deeper look at the documentations definition of these two options.
Apply Defined Authorization Policy is defined as:
Users must try to access the Cisco ISE network via standard authentication and authorization policy application (outside of the native supplicant provisioning process). If you enable this option, the user device goes through standard registration according to any client-provisioning policy applied to the user’s ID. If the user’s device requires a certificate to access the Cisco ISE network, you must also provide detailed instructions to the user describing how to obtain and apply a valid certificate using the customizable user-facing text fields.
Allow Network Access is defined as:
Users are allowed to register their device on the network without having to install and launch the native supplicant wizard.
YAHTZEE!!! The "Allow Network Access" option is just what we need! We want to allow registration without the need for the NSP Wizard. But wait, that's not all. We also need to make sure that the Client Provisioning policies that come with the default install are configured to make the NSP wizard "unavailable".
Client Provisioning Policy
Under Cisco ISE's Menu for "Policy > Client Provisioning" you will find by default a policy that looks like the following:
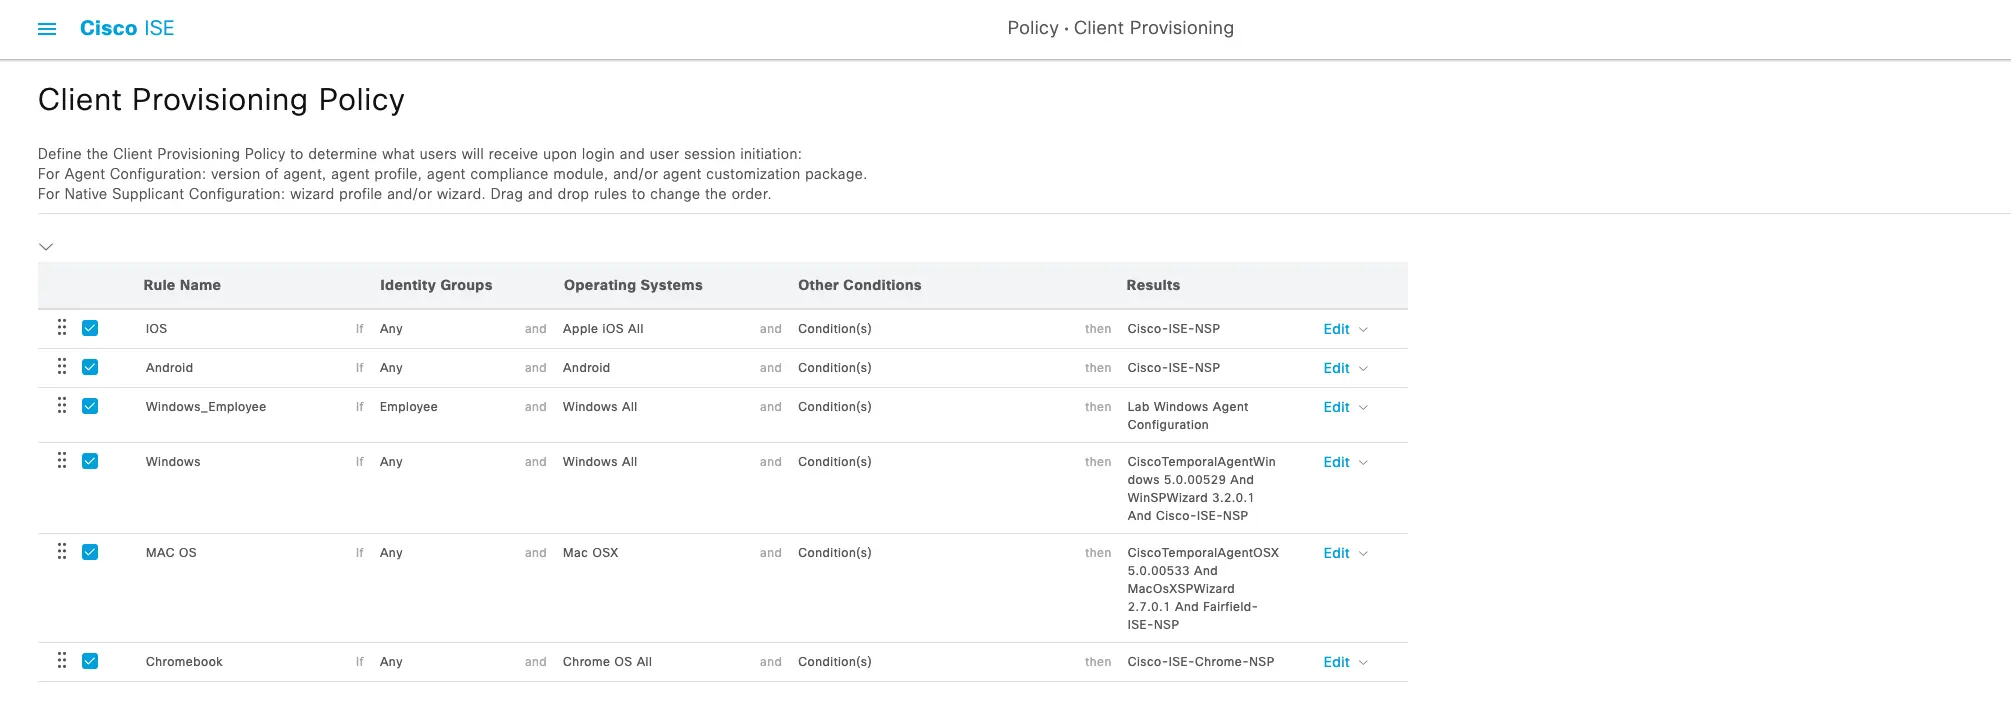
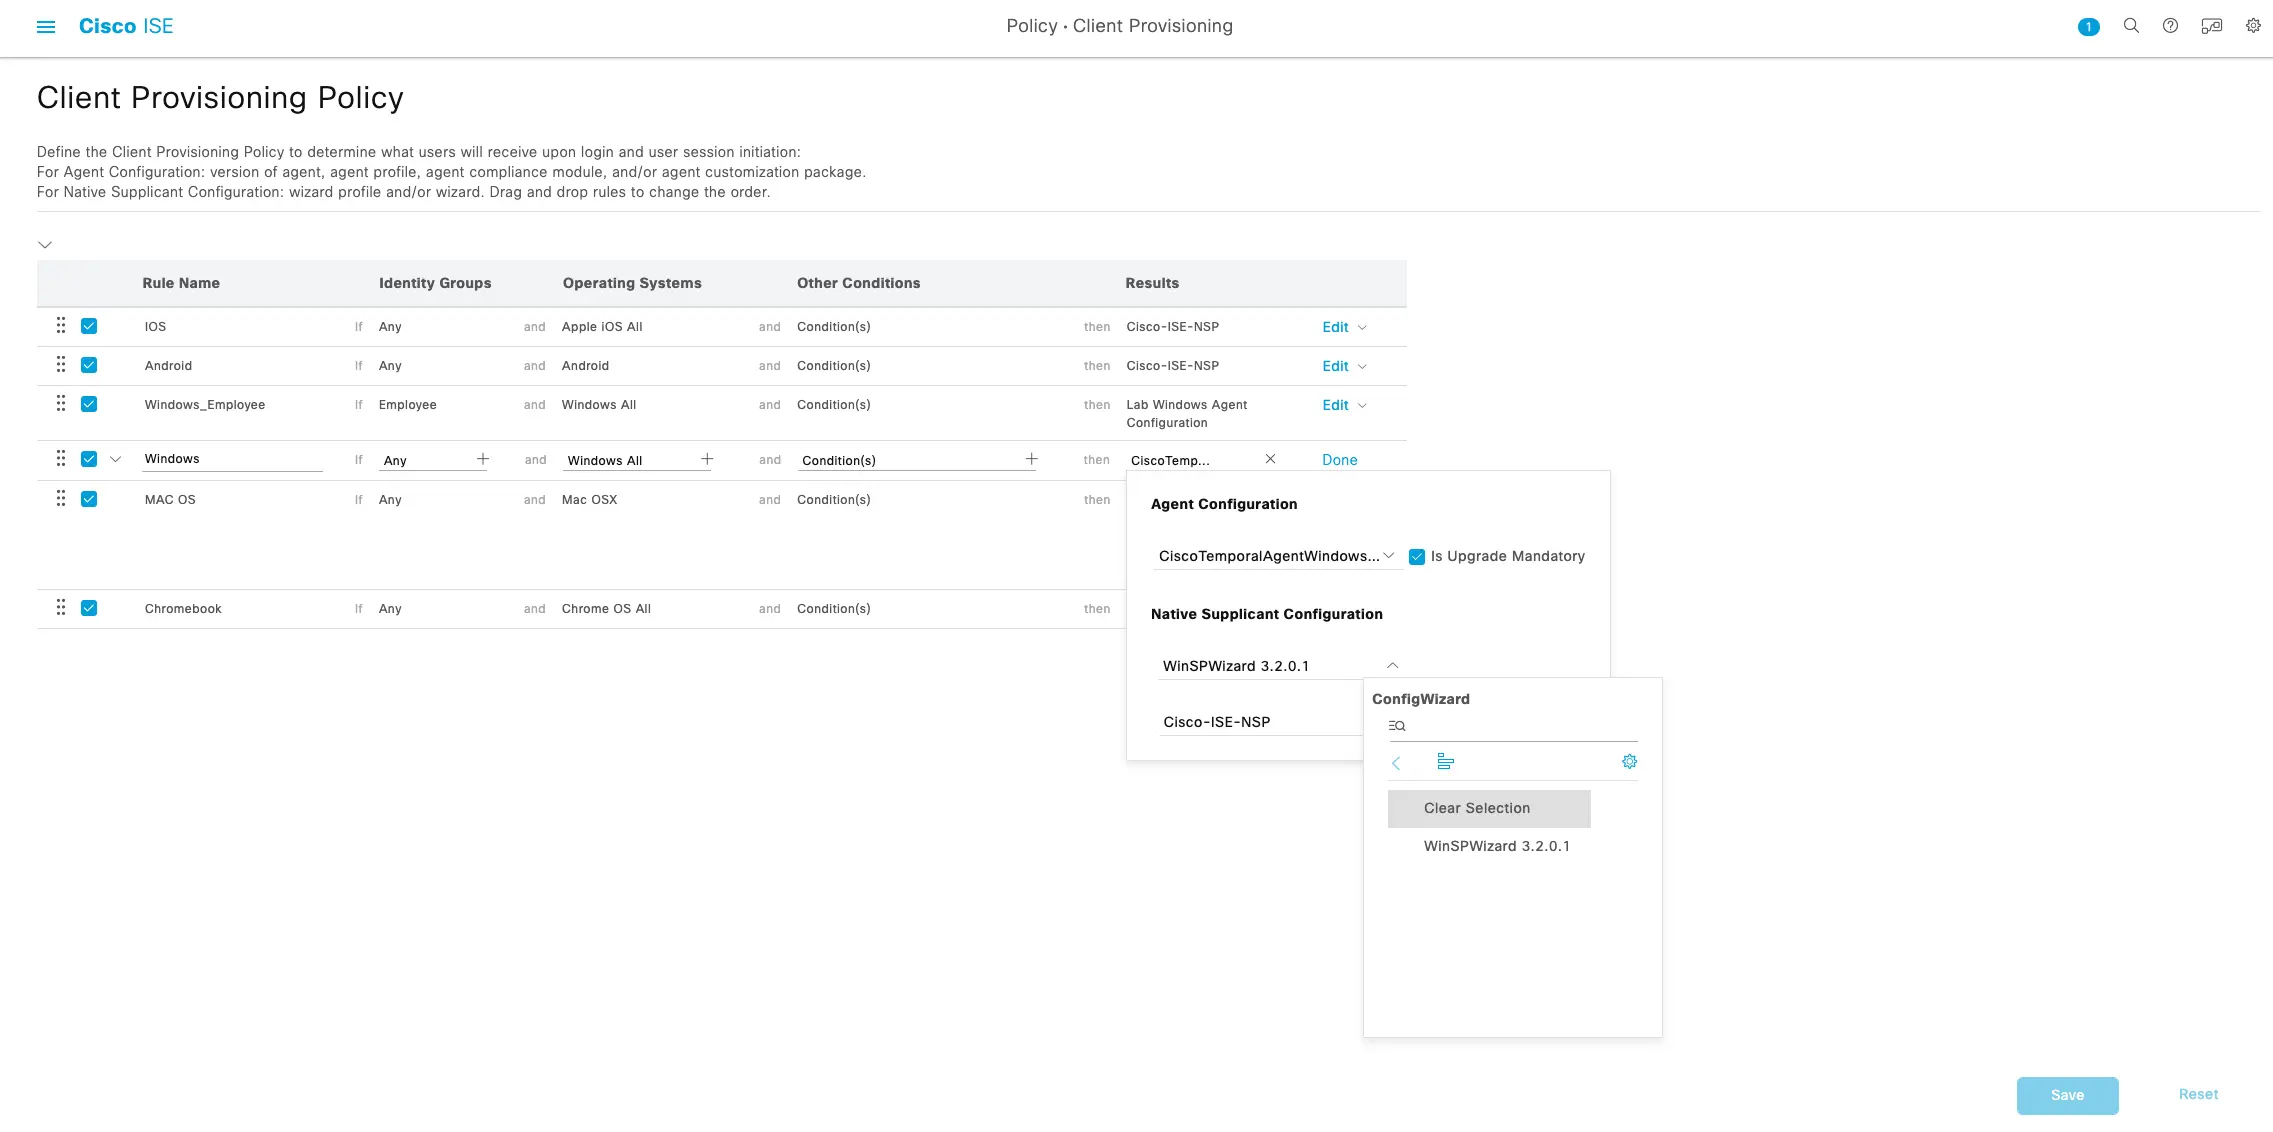
As you can see all the supported OS variants that support client provisioning are setup by default to send an NSP wizard to the client and try to provision the certificates and network settings for the BYOD process flow. In this case, we don't want to do that so we have to modify these settings. Luckily it's as easy as clearing the selection for the native supplicant configuration. For each OS that you want to bypass the NSP process for you will need to edit the policy and under the Native Supplicant Configuration options select the "Clear Selection" for the Config Wizard and Wizard Profile options.
The Policy Set
We can now use the default Onboarding authorization profiles or new ones duplicated from the original to build our Policy Set.
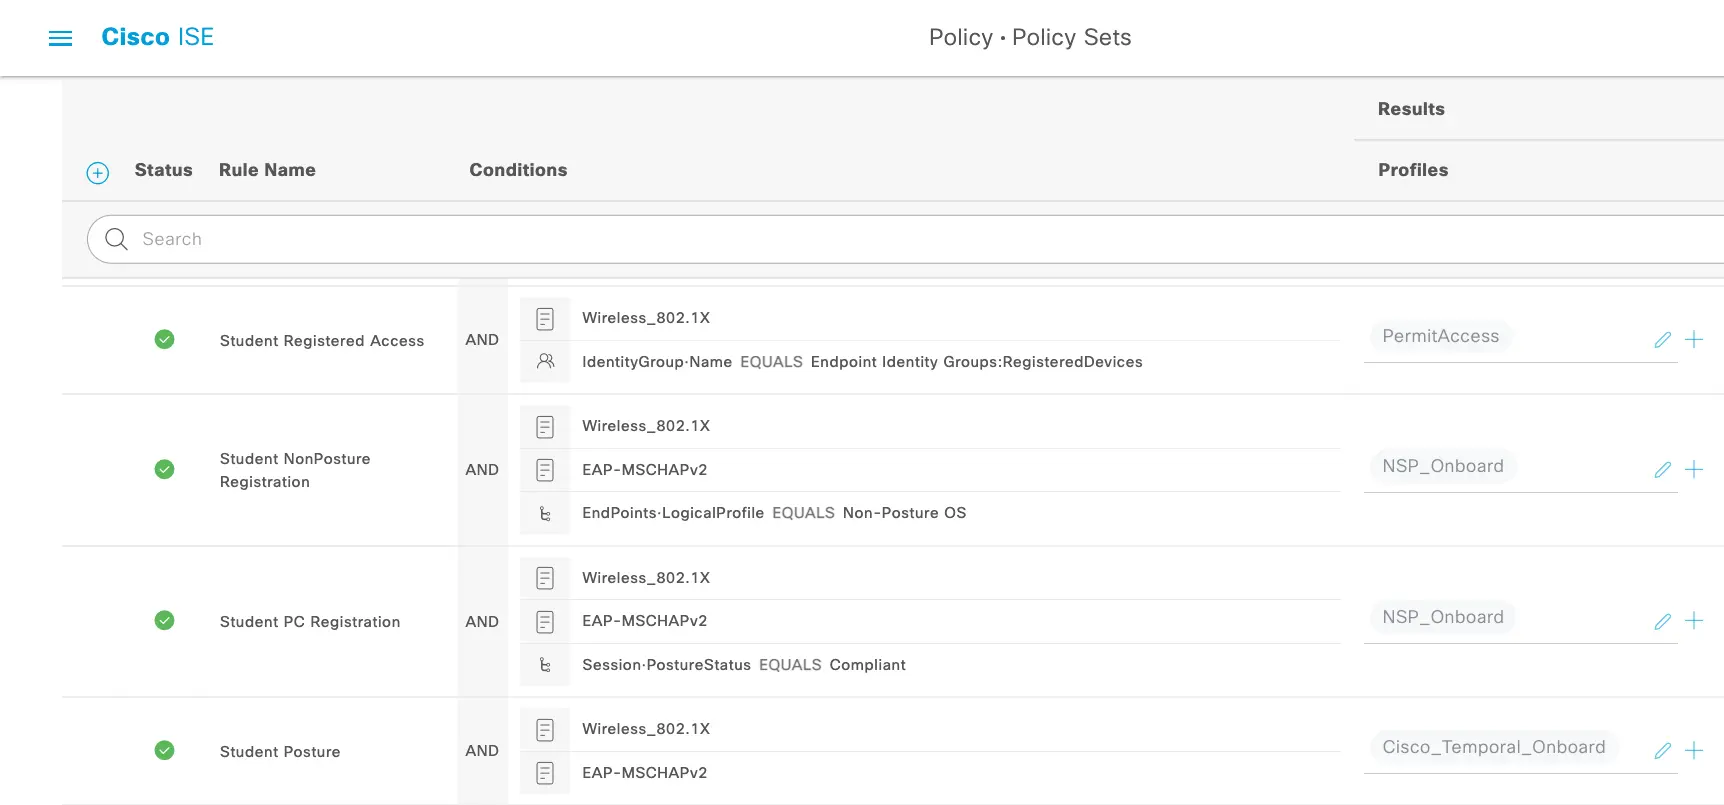
But wait!!! What about reassessing the endpoints?
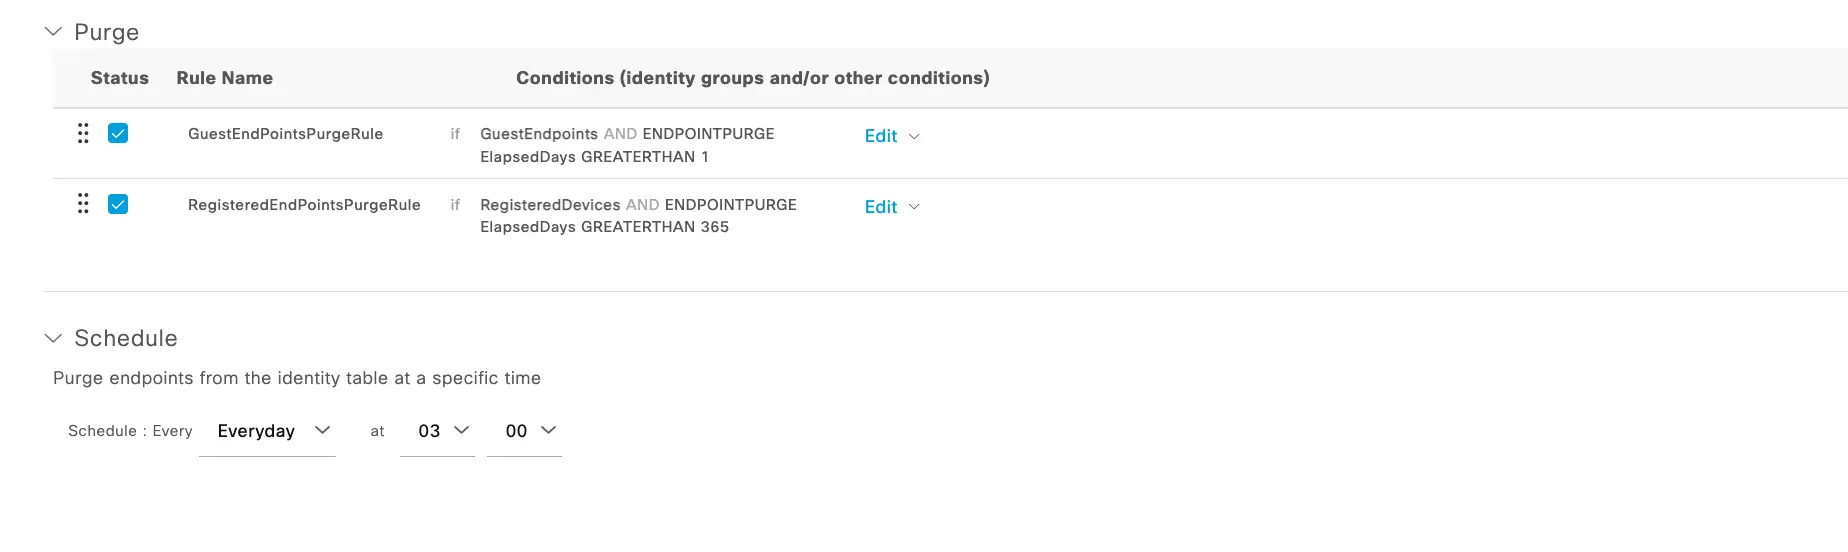
Glad you asked! This is now going to be a function handled by Endpoint Purge rules vs a Periodic Reassessment or forcing assessment at every connection. As you can see in the policy set the portal used in the Authorization Policy is adding the devices to the "RegisteredDevices" identity group (the default). Whether you are using the default or another Identity Group you should set a purge rule based on the frequency that you want to reassess the endpoint connecting through this BYOD flow. The purge settings and other reasons why you should ALWAYS set purge rules are covered in depth by Jamie in another blog but for this example, we are going to want the Students to re-assess at the beginning of each year so we can set the "ElapsedDays" purge condition to GREATERTHAN 365 Days.
Conclusion
Sometimes it is hard to find that setting that may be sitting right in front of you. With the number of knobs that Cisco ISE has to change flows and set policy, it is crucial to read the documentation. Even then it may be hard to fully understand what the turn of the knob may do. Setting up an ISE lab and playing with settings to see how they change the user interaction or consulting with an engineer that has deployed similar use cases before is always a great option. Through all my research and looking for the answers I did not see a great resource that walked through the BYOD options WITHOUT NSP, so here it is, and I hope it helps you now or in the future!
ModernCyber’s Services
If you are looking for help with Cisco ISE or other consultative or implementation services, we provide multiple service options that can be customized to the outcomes and requirements you need to meet.
Schedule some time to speak with one of our cybersecurity experts.